「Cloud Foundry 百日行」第44日目は、データベース付きのCMSツール Anchor CMS です。
基本情報
-
公式サイト
http://anchorcms.com/
手順の概要は以下の通りです。
- 1) ソースコードの取得
- 2) 事前準備
- 3) Cloud Foundry 環境へのプッシュ
- 4) 動作確認
1. ソースコードの取得
$ git clone https://github.com/anchorcms/anchor-cms/
$ cd anchor-cms
さて、今回のアプリケーションですが、最新版のコードには一部 バグ が含まれており、現在開発元が対応中のようです。
今回は検証時に動かすことができたバージョンに git checkout して動かしてみます。
anchor-cms$ git checkout d3383dc
anchor-cms$ ls
anchor  composer.json  content  contributing.md  index.php  install  LICENSE  readme.md  system  themes
2. 事前準備
モジュールの追加
さて、GithubのReadmeにある Requirements によれば、このアプリケーションを起動するには
- PHP 5.3.6+
- curl
- mcrypt
- gd
- pdo_mysql or pdo_sqlite
- MySQL 5.2+
の環境が必要とのことです。
Cloud Foundry上でPHPのアプリを動かす際のモジュールの追加・拡張は、PHP-Buildpackの機能を使ってやっていきましょう。
anchor-cms$ mkdir .bp-config
anchor-cms$ vi .bp-config/options.json
{
    "PHP_EXTENSIONS": ["curl", "mcrypt", "gd", "pdo", "pdo_mysql", "mbstring"]
}
pdo は pdo_mysql を単体で用いようとすると警告を受けるため、 mbstring はマルチバイト文字に対応させるために追加しています。
.htaccessファイルの追加
このままアプリを起動するとhtaccessファイルを追加して下さい、という内容のWarningが表示されるので、予め追加してしまいましょう。
anchor-cms$ vi .htaccess
Options -indexes

<IfModule mod_rewrite.c>
    RewriteEngine On
    RewriteBase /

    # Allow any files or directories that exist to be displayed directly
    RewriteCond %{REQUEST_FILENAME} !-f
    RewriteCond %{REQUEST_FILENAME} !-d

    # Rewrite all other URLs to index.php/URL
    RewriteRule ^(.*)$ index.php?/$1 [L]
</IfModule>

<IfModule !mod_rewrite.c>
    ErrorDocument 404 index.php
</IfModule>
データベースの準備
MySQLのServiceを準備します。
アプリを起動無しモードでデプロイし、
anchor-cms$ cf push anchor-cms --no-start
Creating app anchor-cms in org ukaji / space default as ukaji...
OK

Creating route anchor-cms.10.244.0.34.xip.io...
OK

Binding anchor-cms.10.244.0.34.xip.io to anchor-cms...
OK

Uploading anchor-cms...
Uploading app files from: /home/ukaji/workspace/anchor-cms
Uploading 615.1K, 329 files
Done uploading
OK
Serviceを作り、
anchor-cms$ cf marketplace
Getting services from marketplace in org ukaji / space default as ukaji...
OK

service      plans                     description
PostgreSQL   Basic PostgreSQL Plan*    PostgreSQL on shared instance.
p-mysql      100mb, 1gb                MySQL databases on demand
p-redis      shared-vm, dedicated-vm   Redis service to provide a key-value store

* These service plans have an associated cost. Creating a service instance will incur this cost.

TIP:  Use 'cf marketplace -s SERVICE' to view descriptions of individual plans of a given service.
anchor-cms$ cf create-service p-mysql 100mb anchor-cms-db
Creating service instance anchor-cms-db in org ukaji / space default as ukaji...
OK
アプリとServiceをバインドします。
anchor-cms$ cf bind-service anchor-cms anchor-cms-db
Binding service anchor-cms-db to app anchor-cms in org ukaji / space default as ukaji...
OK
TIP: Use 'cf restage anchor-cms' to ensure your env variable changes take effect
3. Cloud Foundry 環境へのプッシュ
さて、アプリをPushしましょう。
anchor-cms$ cf push anchor-cms
(一部略)
-----> Uploading droplet (27M)

1 of 1 instances running

App started


OK

App anchor-cms was started using this command `$HOME/.bp/bin/start`

Showing health and status for app anchor-cms in org ukaji / space default as ukaji...
OK

requested state: started
instances: 1/1
usage: 256M x 1 instances
urls: anchor-cms.10.244.0.34.xip.io
last uploaded: Tue Aug 4 01:06:44 UTC 2015
stack: cflinuxfs2
buildpack: Found

     state     since                    cpu    memory          disk      details
#0   running   2015-08-04 10:09:20 AM   1.6%   40.6M of 256M   0 of 1G
無事起動しました。
4. 動作確認
ブラウザーからアプリにアクセスします。
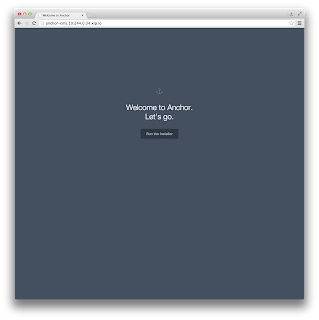
インストーラのページに飛ぶので、 Run the installer ボタンを押下してそのまま進めていきます。
設定項目は言語とTime Zone、データベース、サイト情報、アカウント情報の4つです。
まずは言語とTime Zoneの設定から。
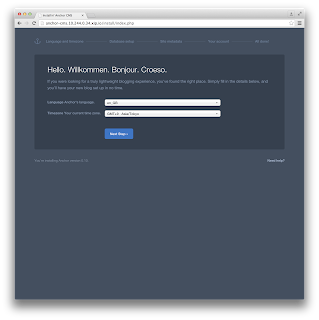
言語は英語、Time Zoneは東京を選択しました。
次にデータベースの設定。
少々設定項目が多いですが、アプリケーションの環境変数情報 cf env を見ながら進めていきましょう。
anchor-cms$ cf env anchor-cms
Getting env variables for app anchor-cms in org ukaji / space default as ukaji...
OK

System-Provided:
{
 "VCAP_SERVICES": {
  "p-mysql": [
   {
    "credentials": {
     "hostname": "10.244.7.6",
     "jdbcUrl": "jdbc:mysql://10.244.7.6:3306/cf_9e3ba864_bff3_4705_bd4b_c8e056c6359f?user=jJtCVAOsOLeZwJ6S\u0026password=QNop8epy7jps2pmF",
     "name": "cf_9e3ba864_bff3_4705_bd4b_c8e056c6359f",
     "password": "QNop8epy7jps2pmF",
     "port": 3306,
     "uri": "mysql://jJtCVAOsOLeZwJ6S:QNop8epy7jps2pmF@10.244.7.6:3306/cf_9e3ba864_bff3_4705_bd4b_c8e056c6359f?reconnect=true",
     "username": "jJtCVAOsOLeZwJ6S"
    },
    "label": "p-mysql",
    "name": "anchor-cms-db",
    "plan": "100mb",
    "tags": [
     "mysql"
    ]
   }
  ]
 }
}

{
 "VCAP_APPLICATION": {
  "application_name": "anchor-cms",
  "application_uris": [
   "anchor-cms.10.244.0.34.xip.io"
  ],
  "application_version": "77ee0038-74e1-460c-a712-459ead61a353",
  "limits": {
   "disk": 1024,
   "fds": 16384,
   "mem": 256
  },
  "name": "anchor-cms",
  "space_id": "03bf316f-df9e-442e-b127-589e673a5652",
  "space_name": "default",
  "uris": [
   "anchor-cms.10.244.0.34.xip.io"
  ],
  "users": null,
  "version": "77ee0038-74e1-460c-a712-459ead61a353"
 }
}

No user-defined env variables have been set

No running env variables have been set

No staging env variables have been set
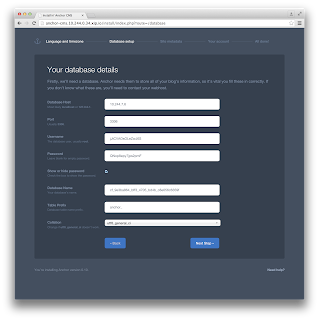
Table Prefix、CollationはそのままでOKです。
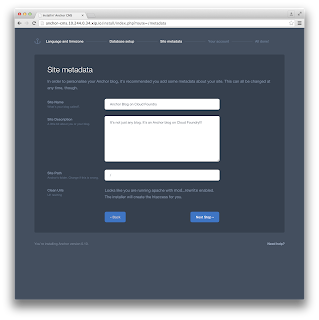
次にサイト情報。ここは変更なしでも大丈夫です。
最後にアカウント設定。ここの項目は後々ログインで必要となるので覚えておきましょう。
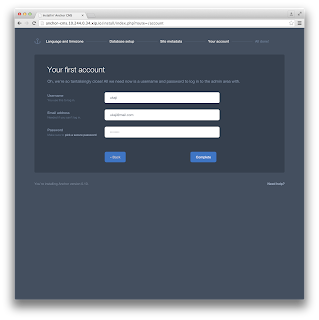
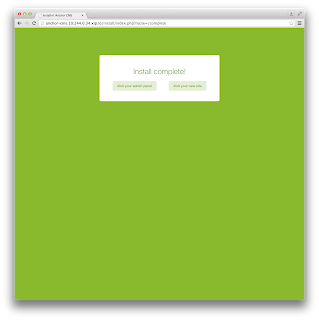
Complete ボタンを押下すれば完了です。
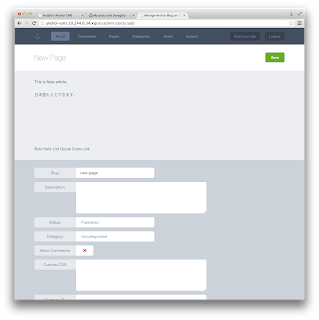
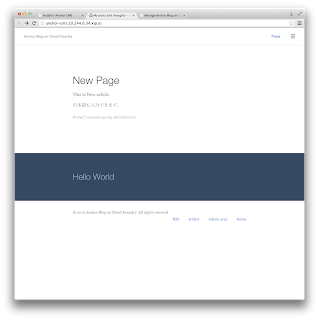
サイトの見た目と管理者ページはこのようになっています。
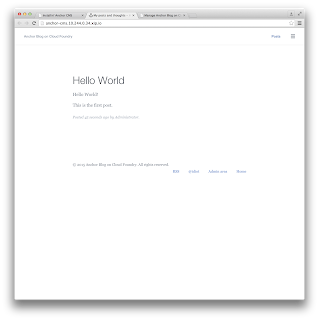
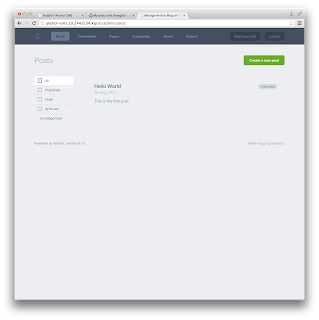
記事の作成も簡単に実行できます。
今回使用したソフトウェア
- cf-release (v211)
https://github.com/cloudfoundry/cf-release/tree/v211
( https://github.com/cloudfoundry/cf-release/tree/2121dc6405e0f036efa4dba963f7f49b07e76ffa ) - bosh-lite
https://github.com/cloudfoundry/bosh-lite/tree/552dc6869600c5350eb7ffb4fb9c9c5e79e3889d - CF CLI (v6.12.0-8c65bbd-2015-06-30T00:10:31+00:00)
https://github.com/cloudfoundry/cli/tree/v6.12.0 - cf-mysql-release (v20)
https://github.com/cloudfoundry/cf-mysql-release/tree/v20 - Anchorcms
https://github.com/anchorcms/anchor-cms/tree/d3383dc65fbed729a0a6e5b25080898e6696f142