「Cloud Foundry 百日行」最終日の第100日目は、Cloud Foundry公式の運用管理用Sinatraアプリ、Administration Web UI for Cloud Foundry NG (以後 admin-ui)です。
admin-uiは、Cloud Foundryの各コンポーネントへアクセスし、そこから収集した稼働状況などの各種情報を表示します。 また、Organization, Spaceの追加・削除や簡単なアプリ操作、Feature Flagsの変更なども行うことができます。
Cloud Foundry Incubatorリポジトリにあるインキュベーション扱いのツールですが、現段階でもブラウザから簡単なCloud Foundaryの運用管理を行うことができる利便性を備えています。
Cloud Foundry Communityから、admin-ui用のBosh Releaseも出ているため、Boshでデプロイすることも可能ですが、リソースの関係上Cloud Foundryのアプリとして起動しておきたい場合等に今回の方法は有効かもしれません。
基本情報
デプロイ準備から動作確認までの手順は以下の通りです。
- 1) Cloud Foundryデプロイメント用マニフェストの修正及びbosh-liteの再デプロイ
- 2) セキュリティグループの追加
- 3) UAAへのadmin-ui用ユーザ登録
- 4) ソースの取得
- 5) ファイルの修正
- 6) デプロイ
- 7) 動作確認
1. Cloud Foundryデプロイメント用マニフェストの修正及びbosh-liteの再デプロイ
admin-uiは、Cloud Foundryの各コンポーネントへアクセスして情報を収集しますが、当然admin-uiのコンテナが起動しているホストのDEAにもアクセスを行います。
今回の検証環境として使用しているcf-release v211は、デフォルトでホストへのアクセスができない設定となっているため、本アプリをデプロイ予定のCloud Foundry環境のデプロイメント用マニフェストに設定を修正し、アクセスできるようにします。
具体的には、dea_next.allow_host_accessの設定をtrueに変更します。すでにtrueとなっている場合は、本手順を無視してください。
下記では本検証環境のパスで記述しますが、環境に応じて読み替えてください。
$ vi ./bosh-lite/manifests/cf-manifest.yml
properties:
    :
  dea_next:
    advertise_interval_in_seconds: 5
    allow_host_access: true     ← ここの値を "true" にする
    allow_networks: []
修正が完了しましたら、boshコマンドでCloud Foundryを再デプロイします。
$ bosh deployment ~/bosh-lite/manifests/cf-manifest.yml
$ bosh deploy
:
Started         2015-06-30 08:00:11 UTC
Finished        2015-06-30 08:00:50 UTC
Duration        00:00:39

Deployed `cf-manifest.yml' to `Bosh Lite Director'
[※ 補足]
すでに色々なアプリが起動中など、諸事情によりできるだけCloud Foundryの再デプロイを実施したくない場合、DEAが起動するコンテナ(runner)に直接ログインして設定ファイルを編集するやり方もあります。
* runnerコンテナにsshでログイン
* sudo権限で、/var/vcap/jobs/dea_next/config/warden.ymlを開き、allow_host_access:の設定をtrueに修正
* sudo権限で、monit restart allして、runner内のコンポーネントを再起動
2. セキュリティグループの追加
次に、Cloud Foundryへコンテナから各Cloud Foundryコンポーネントへアクセスを許可するために、セキュリティグループの設定を行います。
本操作は、admin権限のあるcfユーザで行います。
下記では本検証環境の設定で記述しますが、環境に応じて読み替えてください。
$ cf login -u admin -p admin -o admin -s svcs
セキュリティグループを定義したjsonファイルを作成します。
今回は、bosh-lite環境のネットワークに合わせて設定します。本来であれば、アクセス対象のportに絞るべきですが、今回は絞込みが間に合わなかったため、フルオープンにしています。
vi admin-ui.security-groups.json
[
    {
    "protocol": "tcp",
    "destination": "10.244.0.134",
    "ports": "1-65535"
    },
    {
    "protocol": "tcp",
    "destination": "10.244.0.42",
    "ports": "1-65535"
    },
    {
    "protocol": "tcp",
    "destination": "10.244.0.34",
    "ports": "1-65535"
    },
    {
    "protocol": "tcp",
    "destination": "10.244.0.138",
    "ports": "1-65535"
    },
    {
    "protocol": "tcp",
    "destination": "10.244.0.146",
    "ports": "1-65535"
    },
    {
    "protocol": "tcp",
    "destination": "10.244.0.142",
    "ports": "1-65535"
    },
    {
    "protocol": "tcp",
    "destination": "10.244.0.6",
    "ports": "1-65535"
    },
    {
    "protocol": "tcp",
    "destination": "10.244.0.30",
    "ports": "1-65535"
    },
    {
    "protocol": "tcp",
    "destination": "10.244.0.22",
    "ports": "1-65535"
    },
    {
    "protocol": "tcp",
    "destination": "10.244.0.26",
    "ports": "1-65535"
    },
    {
    "protocol": "tcp",
    "destination": "10.244.0.130",
    "ports": "1-65535"
    }
]
定義したセキュリティグループの設定を登録します。
$ cf create-security-group admin-ui-security-groups admin-ui.security-groups.json
Creating security group admin-ui-security-groups as admin
OK
$ cf security-groups
Getting security groups as admin
OK

     Name                       Organization   Space
#0   public_networks
#1   dns
#2   admin-ui-security-groups
登録したセキュリティグループを、admin-uiをデプロイする予定のSpaceにバインドします。
以下の例では、admin-ui-security-groupsを、horiu-jnというOrganizationのhoriu-jnというSpaceにバインドしています。
$ cf bind-security-group admin-ui-security-groups horiu-jn horiu-jn
:
OK
3. UAAへのadmin-ui用ユーザ登録
UAAに、admin-ui用のグループやユーザの登録および権限の付与を行っていきます。
3-1. uaacのインストール
UAAへの操作は、UAA用クライアントであるuaacを介して実行します。
そのため、まずはuaacをインストールします。
$ gem install cf-uaac
$ rbenv rehash
$ uaac --version
UAA client 3.1.4
3-2. admin-ui用グループ及びユーザの登録
インストールしたuaacを使ってユーザ登録を行っていきます。
ここではadmin-uiのREADMEに記載されている手順をそのまま行います。
まずは、登録のための前準備を行います。
$ uaac target http://uaa.10.244.0.34.xip.io

Target: http://uaa.10.244.0.34.xip.io
$ uaac token client get admin -s admin-secret

Successfully fetched token via client credentials grant.
Target: http://uaa.10.244.0.34.xip.io
Context: admin, from client admin
$ uaac client update admin --authorities "`uaac client get admin | \
    awk '/:/{e=0}/authorities:/{e=1;if(e==1){$1="";print}}'` scim.write"

  scope: uaa.none
  client_id: admin
  resource_ids:
  authorized_grant_types: client_credentials
  autoapprove:
  action: none
  authorities: password.write scim.write clients.write clients.read scim.read
      uaa.admin clients.secret
$ uaac token client get admin -s admin-secret

Target: http://uaa.10.244.0.34.xip.io
Context: admin, from client admin
次に、グループ・ユーザを追加と権限の付与を行っていきます。
$ uaac group add admin_ui.admin

  id: 7c07bbc4-d4f4-47cb-ac2f-3370bde143cb
  schemas: urn:scim:schemas:core:1.0
  meta
    version: 0
    created: 2015-11-13T10:56:27.239Z
    lastmodified: 2015-11-13T10:56:27.239Z
  displayname: admin_ui.admin
$ uaac member add admin_ui.admin admin

success
最後に、admin-ui用クライアントを作成します。
uaac client add admin_ui_client \
 --authorities cloud_controller.admin,cloud_controller.read,cloud_controller.write,openid,scim.read \
 --authorized_grant_types authorization_code,client_credentials,refresh_token \
 --autoapprove true \
 --scope admin_ui.admin,admin_ui.user,openid \
 -s admin_ui_secret


  scope: admin_ui.admin openid admin_ui.user
  client_id: admin_ui_client
  resource_ids:
  authorized_grant_types: refresh_token client_credentials authorization_code
  autoapprove: true
  action: none
  authorities: cloud_controller.write openid scim.read cloud_controller.read
      cloud_controller.admin
  id: admin_ui_client
4. ソースの取得
admin-uiのソースを、GitHubから取得します。
$ git clone https://github.com/cloudfoundry-incubator/admin-ui.git
$ cd admin-ui/
admin-ui$ ls -a
.   bin     db       Gemfile.lock  .gitignore  lib      README.md     .ruby-version  .travis.yml
..  config  Gemfile  .git          images      LICENSE  .rubocop.yml  spec
5. ファイルの修正
admin-uiは、起動時に指定する設定ファイル(bosh-liteではconfig/default.yml)に記載されているポートを使って起動する仕様になっているため、Cloud Foundry用にPORT環境変数からポートを取得するように、lib/admin/config.rbを修正します。
admin-ui$ git diff --no-prefix
diff --git lib/admin/config.rb lib/admin/config.rb
index 2573bf6..5d6f6d4 100755
--- lib/admin/config.rb
+++ lib/admin/config.rb
@@ -195,7 +195,7 @@ module AdminUI
     end

     def port
-      @config[:port]
+      ENV["PORT"] || @config[:port]
     end

     def receiver_emails
これでやっとデプロイ前の作業は完了です。
6. デプロイ
まずは、デプロイ用のマニフェストを作成します。
admin-ui$ vi manifest.yml
---
applications:
- name: admin-ui-100
  memory: 512M
  instances: 1
  command: ~/bin/admin -c ~/config/default.yml
上記設定で、 commandにおいては、config/default.ymlがbosh-lite用の設定になっているので、そのまま設定ファイルとして指定します。
マニフェストの作成が完了したら、cf pushします。
admin-ui$ cf push
:
requested state: started
instances: 1/1
usage: 512M x 1 instances
urls: admin-ui-100.10.244.0.34.xip.io
last uploaded: Fri Nov 13 10:58:42 UTC 2015
stack: cflinuxfs2
buildpack: Ruby

     state     since                    cpu    memory        disk      detail                           s
#0   running   2015-11-13 07:59:36 PM   0.0%   80M of 512M   0 of 1G
無事、デプロイは成功しました。
7. 動作確認
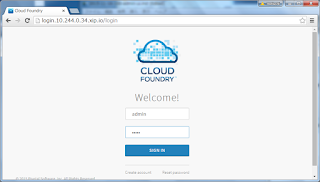
ブラウザから払いだされたアプリのURLへアクセスすると、ログインページが表示されます。
初期ユーザは、bosh-lite用のCloud Foundryデプロイメント用マニフェストを修正していなければ、admin/adminになるはずなので、入力してログインします。
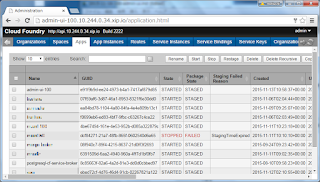
ログインに成功すると、上段に結構な数のタブが並んでいます。ここでは、いくつかカテゴリごとにピックアップして確認していきます。
まずは、Appsを開いてみると、全ユーザが上げているアプリの一覧が表示されます。
スクリーンショットはありませんが、上部のボタンでアプリのストップや削除操作も問題なく行えました。
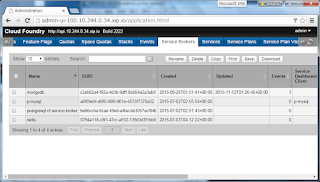
次に、Service Brokersを開いてみます。
今回の百日行で活躍してくれたサービスの面々が表示されます。
労をねぎらいながら次に行きたいと思います。お疲れ様でした。
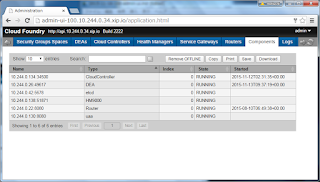
Cloud Foundryのコンポーネントの稼動状態を見たい場合は、Componentsのタブが便利です。
bosh vmsコマンドで確認できるレベルの内容を見ることができます。
各コンポーネントのタブで、より詳細な情報を見ることが出来ます。
Nameの値をクリックすると、下のスペースに詳細が表示されます。また、詳細のURLのリンクをクリックすると、varzのRawデータも表示できます。
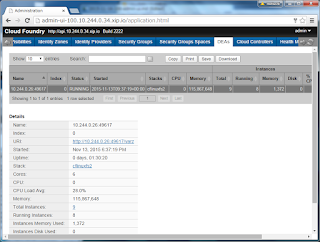
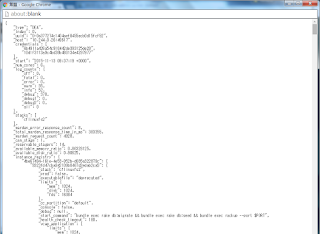
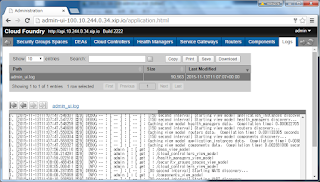
また、起動時に指定した設定ファイル(今回はconfig/default.yml)内の設定により、指定したログファイルの内容が閲覧できます。
デフォルトでは、admin_ui自身のログのみですが、設定を追加することで各コンポーネントのログを表示させることも可能です。
設定方法については、READMEで確認することができます。
最後にFeature Flagのタブを確認します。
操作したいFeatureにチェックをいれて、Enable/Disableボタンで設定を変更することが出来ます。
ここでは、app_scalingをDisableにしてみました。
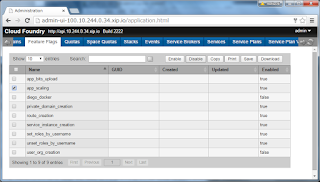
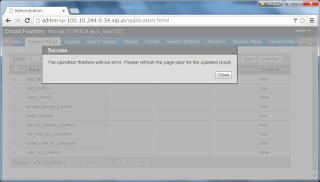
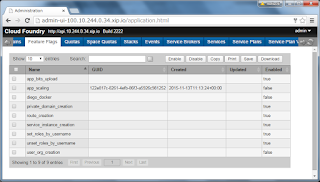
Disableへ変更後、本アプリをスケールさせてみると、Feature Disabledで想定通りにスケールに失敗しました。
admin-ui$ cf scale admin-ui-100 -i 2
Scaling app admin-ui-100 in org horiu-jn / space horiu-jn as horiu-jn...
FAILED
Server error, status code: 403, error code: 330002, message: Feature Disabled: app_scaling
再度Enableに戻すと、問題なくスケールすることが出来ました。
admin-ui$ cf scale admin-ui-100 -i 2
Scaling app admin-ui-100 in org horiu-jn / space horiu-jn as horiu-jn...
OK
今回使用したソフトウェア
- cf-release(v211)
https://github.com/cloudfoundry/cf-release/tree/v211
(https://github.com/cloudfoundry/cf-release/tree/2121dc6405e0f036efa4dba963f7f49b07e76ffa) - bosh-lite
https://github.com/cloudfoundry/bosh-lite/tree/552dc6869600c5350eb7ffb4fb9c9c5e79e3889d - CF CLI (v6.12.0-8c65bbd-2015-06-30T00:10:31+00:00)
https://github.com/cloudfoundry/cli/tree/v6.12.0 (https://github.com/cloudfoundry/cli/tree/8c65bbd4d243cbbc9bdbf2ec2a3b0e094c094f48) - admin-ui
https://github.com/cloudfoundry-incubator/admin-ui/tree/17c429c28891673c057dd69e52bdeb3efc08376c
投稿者:NTTソフトウェア株式会社 堀内 純